
TENS and EMS Electrode Pad Compatibility
Choose replacement TENS or EMS electrode pads by matching the exact device model, the pad connection and the electrode part number recommended in the manual. A two-millimeter pin socket, a snap and a proprietary module can all appear on electrode pads, and each calls for a different mating part. Once the model and connector match, check the approved pad dimensions and whether the product is disposable or labeled for repeated use.
If you have the old pad, keep its package or part number until you confirm the replacement. Photograph both ends of the lead if a seller asks for an interface reference. The connector at the machine and the connection at the pad are separate dimensions. A description that says only “3.5 mm” may refer to the plug at the machine rather than the pin or snap at the pad.
Compare connector types · Check adhesive and reuse labels · Replacement checklist
Pin, snap and module connections
| Pad connection | What to identify | What to verify in the manual |
|---|---|---|
| Pin and socket | Pin diameter, socket style and pad-end geometry | Matching lead and approved pad model |
| Snap or press stud | Mating snap shape, diameter and snap count | Approved snap series and any device restrictions |
| Direct device attachment | Model-specific pad mount or contact layout | Exact device and pad part numbers |
| Captive or integrated lead | Device-side plug and complete assembly number | Whether the pad and lead are replaced together |
For a wired system, first look at the pad end of the lead. With a pin connection, the lead usually mates with a socket on the pad or on a short pad tail. With a snap connection, the lead clips onto a stud or mating terminal. Some devices use pads that attach directly to a control module without a separate pair of lead wires. Snap contacts can differ in diameter and shape. The FDA-hosted K190700 device summary illustrates examples of both leadwire and snap variants and lists several diameters within each family.
Snap Electrodes for TENS Unit Replacement
Compare the pad-side connection on your existing lead with the replacement listing. Check the number and spacing of the snaps, then look up the device model and accessory part number. A listing that gives only the plug size at the machine end leaves the pad-side fit unresolved.
A matching-looking snap gives you a starting point for identification. Confirm the actual accessory number or compatibility statement. For example, OMRON lists particular model numbers for its standard Long Life replacement pads and specifies use with its recommended accessories. Axelgaard also offers snap electrodes for TENS and EMS. These are distinct manufacturer systems. Check the listing for your own equipment rather than transferring a compatibility claim from one pad family to another.
Separate the machine plug from the pad connection
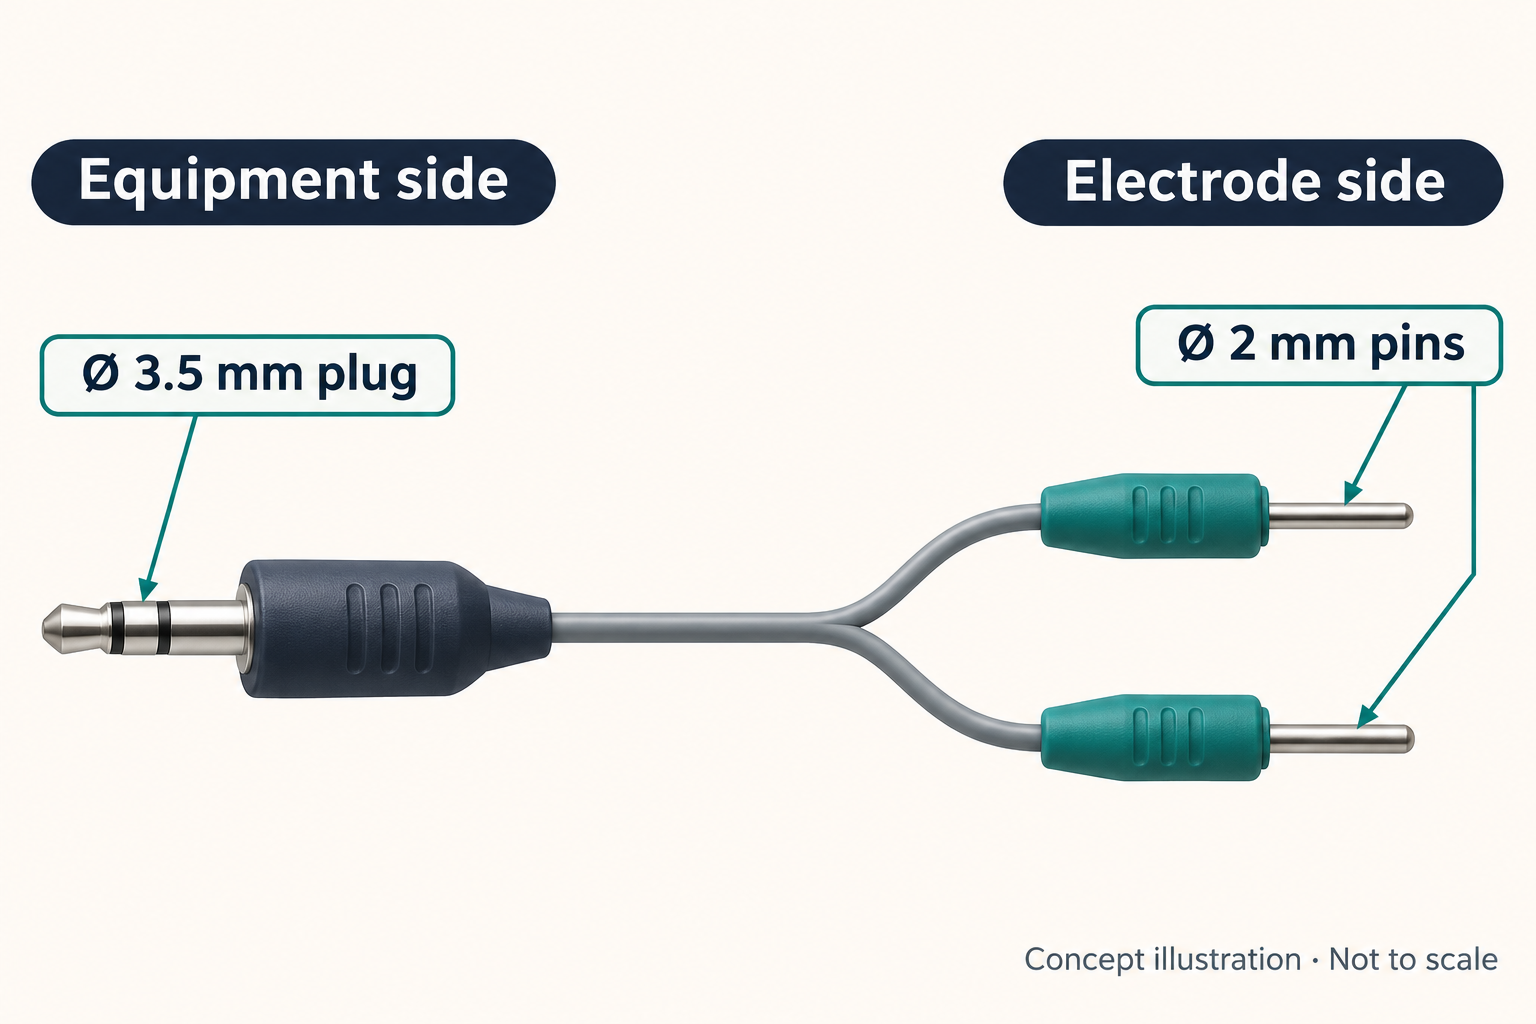
The equipment plug fits the output socket or connector on the stimulator. The pad-side contacts connect to the electrode pads. A cable described as 3.5 mm to 2 mm can have a 3.5 mm device-side plug and 2 mm pins at the electrode end. The numbers describe different ends of the assembly. A snap electrode can require a snap-end lead even if the manufacturer also supplies a pin-end lead for another model. Check whether a cable branches into two outputs and how the manufacturer identifies the two branches.
If the original lead has an angled plug, molded key or recessed contact, record the relevant feature along with its nominal diameter. A similar-looking plug can stop short of full engagement when the housing shoulder or insertion length differs. Compare the actual mating geometry and model number. OEM teams specifying both sides of a wire assembly can refer to the 3.5 mm to 2 mm pin lead wire page to see which dimensions to include in a request.
Self-adhering, reusable and disposable electrode pads
TENS Adhesive Electrode Pads
When choosing a replacement, check the device model and connector first, then confirm the pad shape, size and reuse instructions. A self-adhesive pad can use a snap or a pin connection. The adhesive description tells you how the pad attaches to the skin, while the connector description tells you how it attaches to the lead.
Self-adhering and self-adhesive describe how an electrode stays in contact with the skin. Many surface electrodes use an adhesive hydrogel with a backing and a conductive layer. Reusable and disposable describe the use allowed by the label. These terms identify different properties, so a self-adhering pad may be intended for one application or for multiple applications by a single person. Check the instructions supplied with the exact pad model to determine how the adhesive surface is stored and whether the manufacturer allows cleaning.
A non-adhesive electrode may be designed for a specific holder, strap, garment or conductive interface. Check the equipment instructions for the approved accessory and retention method. Treat a disposable pad according to its label. For a reusable pad, check the manufacturer’s limits and inspect the condition of the contact surface and connector before use. Storage and cleaning directions are product-specific. For example, the reuse and cleaning details on one OMRON replacement pad listing apply to that model family.
If a pad is labeled for one person and more than one use, that is a different instruction from a pad that can be shared. Check the full reuse wording rather than reading “reusable” alone. Biomedical and purchasing teams should retain the manufacturer instructions and keep the permitted use separate from the unit pack count and procurement description.
Select a size and shape from the approved options
Common formats include square, rectangular, round and contoured pads. A listing for large or small TENS electrodes usually gives the pad’s length and width or diameter. When comparing options, find out whether the measurement describes the backing or the active contact area. Two products with the same overall size can use different conductive layers, connector positions and edge geometries. Check the listed dimensions and compatible part number rather than using the product photo as a scale reference.
Pad area influences electrical contact and can affect current density under the same total current. Follow the device maker’s specified pad options and use instructions when choosing between small and large pads. For replacement inventory, store the size, shape and connector with the compatible model list. For a component design request, specify which outline, contact area and connector position are controlled on the drawing.
A lead assembly designed for an external stimulation pad has a different interface from many sensing electrodes. If the parts are described as sensor lead electrode pads, check whether the device is measuring a signal or delivering stimulation. Match the electrode and lead to the identified equipment and its intended accessory family. A similar appearance or a shared connector term gives limited information about how the pad is intended to operate.
How to identify a replacement from incomplete packaging
If only the lead remains, note how many conductors emerge from the machine plug and how each branch ends. Read any numbers molded into the cable or printed near the connector. Take a photograph that shows the contact geometry from the side and end, with a size reference alongside it. These details can help the manufacturer distinguish several visually similar accessory families. Compare the resulting accessory number against the device’s manual before ordering.
If only a loose pad remains, look for the part number on its backing or release liner. Identify whether it has a central snap, multiple snaps, a flexible tail with a socket, or contacts for a direct-mounted device. The visible edge can help tell a foam-backed or fabric-backed construction apart, although appearance alone does not establish an approved replacement or permitted reuse. A clear note of whether it came from a sealed pack gives the manufacturer more context than a description of its color.
For a distributor handling more than one product line, avoid building an inventory record around a broad term such as universal snap pad. Store the connector form, approved model list, dimensions, package count and reuse designation in separate fields. If the manufacturer revises an accessory or changes its packaging, the old and new catalog numbers can be tracked without losing the device compatibility record. This also helps a customer service team answer whether a replacement needs a new lead or can be used with the listed existing assembly.
Replacement pad checklist
| Check | Where to find it |
|---|---|
| Device make and exact model | Equipment label and manual |
| Approved replacement part number | Accessory list or manufacturer compatibility lookup |
| Pad-side connector and lead number | Original lead, packaging and accessory drawing |
| Dimensions and contact configuration | Product drawing, pack label or manufacturer datasheet |
| Reuse and storage instructions | Instructions included with the individual pad model |
Start with the model number on the equipment label rather than a series name. Look up the accessory list for that model and confirm the original or approved replacement part number. Compare the device-side connector and the pad-side connector separately, including the number of contacts and any shape or keying. If the device has more than one output or a detachable module, check which port and accessory variant you are identifying.
Before ordering, confirm the approved pad dimensions, the number of pads in the package and the use instructions. When buying for several device variants, store the replacement part and compatible model list together. Two pads that look the same in a stockroom can have different snaps or lead ends. Labeling the bin with the manufacturer’s accessory number reduces avoidable substitutions.
OEM sourcing teams can use the same checklist when reviewing external leads. Supply the mating reference on both ends of the cable, wire length and routing constraints, branch configuration, labeling requirements and intended quantity. Include a drawing or reference assembly with the critical dimensions and identify which records your incoming inspection needs. Review medical wire and cable assembly options for drawing-based procurement. For a component project, use the link below to send the assembly requirements to MOOSEN.
TENS and EMS pad compatibility questions
Are TENS and EMS electrode pads interchangeable?
Some manufacturers list specific products for both TENS and EMS. Use the equipment manual and the pad manufacturer’s compatibility information to identify approved accessories for the exact model. Apply the same model-specific check to electrodes marketed for NMES or FES.
Can I replace a snap electrode with a pin electrode?
The connections mate with different lead ends. Consult the device’s approved accessories for the replacement pad and lead combination.
What does self-adhering mean on a TENS pad package?
The pad uses an adhesive contact surface. The label also specifies whether it is disposable or intended for repeated applications and explains the applicable handling and storage.
Can I use a larger TENS electrode with the same snap?
Check which pad sizes are listed for your specific device. Connector fit, pad area and device compatibility each need to agree with the manufacturer’s instructions.
Which part should I replace when the connection is loose?
Identify the approved pad and cable part numbers and inspect the mating ends according to the user manual. The loose interface can involve either the electrode pad connector or the lead. Contact the equipment manufacturer if the correct part is unclear.